Monday, September 9, 2013
Bloglovin
<a href="http://www.bloglovin.com/blog/10598585/?claim=j795r3xn4dd">Follow my blog with Bloglovin</a>
DIY Button and Felt Bouquet
I have always wanted to make one of these. I think they are so pretty! Thanks to Craftedblog.com for sharing the instructions for making one of these. Here is the link to the full tutorial:
http://www.craftedblog.com/2013/09/diy-button-and-felt-bouquet.html
Instead of making this as a bouquet, I thought it would be fun to make a few smaller ones for you home without the stem in a color that matches your home decor.
Happy Crafting!
Deanna :)


http://www.craftedblog.com/2013/09/diy-button-and-felt-bouquet.html
Instead of making this as a bouquet, I thought it would be fun to make a few smaller ones for you home without the stem in a color that matches your home decor.
Happy Crafting!
Deanna :)
Wednesday, August 28, 2013
Indigi Design Studio: Chevron IPhone Case
Indigi Design Studio: Chevron IPhone Case: I found this tutorial while browsing my favorite blogs today. It looks like fun and doesn't look to hard to make. If I had an iphon...
Chevron IPhone Case

I found this tutorial while browsing my favorite blogs today. It looks like fun and doesn't look to hard to make. If I had an iphone I would make one for myself!
Full instructions and more photographs are found on this blog:
http://www.craftsunleashed.com/craft-basics-main/chevron-diy-iphone-case/
I would love to see your versions of this. Happy Crafting!
Deanna :)
Thursday, August 22, 2013
Fun with Finger Puppets and Such

As I was browsing some of my favorite blogs this morning I came across these cute ideas to make for little kids. I watch my little grandson during the week and we are always looking for a new craft to create. He loves painting, stamping and making things. I think we will give these a try when the weather demands more indoor activities. I hope you enjoy these as well.
Thank you http://liagriffith.com/printable-farm-animal-finger-puppets/ for the cute patterns and ideas.
Have a great day everyone!
Deanna :)

Tuesday, August 6, 2013
Organza Rose Tutorial
Good Morning!
Last week I found this tutorial for a beautiful organza rose as I was searching for new ideas to blog about. I love collecting ways to make different flowers from fabric and ribbon. This is the first one I have found on how to make a rose from organza.
I love it and hope you will. This blog called The Little Treasures is a beautiful blog with so many unique ideas. If you have time you should look at the blog and see what I mean. Very inspiring!
Hope your day is great. :)
Deanna

http://thelittletreasures.blogspot.com/2012/03/last-minute-gifts-organza-rose-tutorial.html
Friday, July 19, 2013
DIY All Occasion Card
Hello Everyone,
I found this cute, simple to make birthday card while searching for new ideas. It can be made as a birthday card or any other card for that matter. I can see it as a wedding card. Just change the tag and you have a great, simple card for many different occasions.
Happy Crafting!
Deanna :)

http://bettys-crafts.blogspot.de/2013/07/happy-birthday-die-elfte.html
I found this cute, simple to make birthday card while searching for new ideas. It can be made as a birthday card or any other card for that matter. I can see it as a wedding card. Just change the tag and you have a great, simple card for many different occasions.
Happy Crafting!
Deanna :)
http://bettys-crafts.blogspot.de/2013/07/happy-birthday-die-elfte.html
Wednesday, July 17, 2013
Free Gift Tag Download and Cute Wrapping Ideas

I found these gift tags that you can download for free on one of my favorite websites:
http://liagriffith.com/sweet-summertime-printable-gift-wrap-and-gift-tags/
For more pictures and paper downloads please visit her website. She has so many wonderful ideas.
Enjoy!
Deanna :)
Saturday, July 13, 2013
Cute and Easy To Make Hair Clips
Just this morning as I was doing my hair I was thinking about how I could clip my hair up on the side.
The only thing that came to mind was bobby pins. When I checked my email this morning this is what I found from the blog Pretty Life Anonymous! They look simple and looks fun to make.
For complete instructions please visit the following link:
http://prettylifeanonymous.blogspot.com/2013/07/pla-diy-patterned-hair-clips.html

Friday, July 12, 2013
Five Ways to Use Coconut Oil
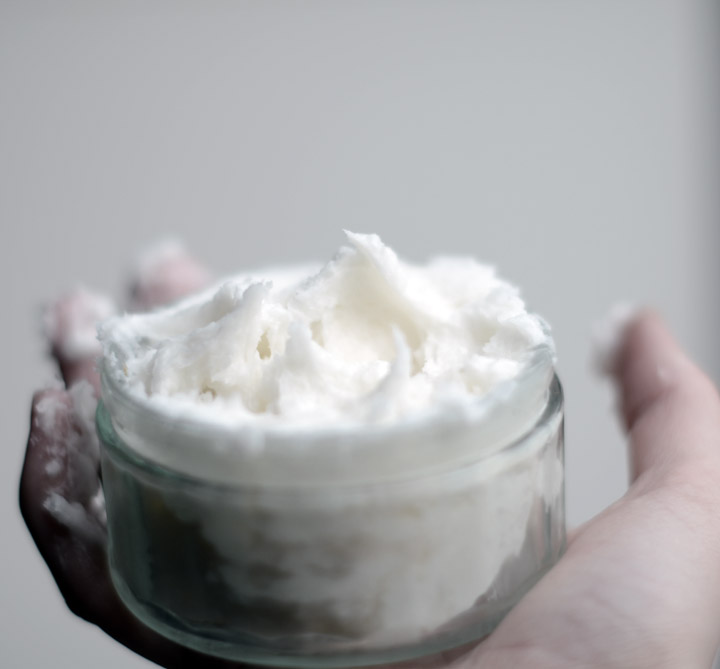
When browsing my local store recently, I came across a massive pot of coconut oil. I was surprised to find it there because I thought you usually would find coconut oil in more glamourous, health savvy shops – this was just the corner store I buy late night Haagen-Dazs from. Anyway, I underestimated eastern cuisine because according to the Turkish salesman it is often used in place of other oils – so healthy !
For a long time, I used coconut oil for cooking, too. I stopped cooking with olive oil after hearing it was cancerogenic and didn’t like to use other oils because of their stronger taste. Coconut oil was the perfect solution : it melts in seconds, cooks lighter healthier food and only has a subtle taste. I don’t know why I stopped using coconut oil to cook, I just ran out and never topped up…! So naturally when I saw the great big pot (for only £2.19 !) at the corner store, I grabbed it and shoved it in my basket. Healthy cooking, here I am again !
Cooking is not all coconut oil is good for – I have used it on my body before too. In fact I would often combine the two, rubbing oil into my hands to give them a deep moisturize at the same time as plonking some in the pan… I just love the way it melts in a split second on contact with your skin, it’s almost fun to watch ! So I thought I would explore a little more now coconut oil and I are back in touch. I feel that including more of it in my beauty routine would be a healthy and economic choice as well as home-spa bliss !
These five DIY beauty recipes take no time to prepare and only need very basic ingredients – in fact, often no more than just coconut oil. I hope you get to try them out at home, I can guarantee your skin and hair will benefit from regular use !
http://www.clonesnclowns.com/2013/02/25/diy-beauty-5-ways-to-use-coconut-oil/
Written by Aimee from Clones and Clowns
THE PERFECT LIP BALM
SMOOTH HAND CREAM
WHIPPED BODY BUTTER
NOURISHING HAIR OIL
NATURAL MAKE-UP REMOVER
Braided Headband
While in Missouri last week on vacation, my sister Donna taught me how to make these adorable headbands. Today, while browsing, I found this tutorial with pictures. I do so much better with visuals.
Hope you enjoy making yourself one of these cuties! For full instructions and detailed photos, please visit Clones and Clowns blog at:
http://www.clonesnclowns.com/2013/07/11/diy-braided-liberty-headbands/


Hope you enjoy making yourself one of these cuties! For full instructions and detailed photos, please visit Clones and Clowns blog at:
http://www.clonesnclowns.com/2013/07/11/diy-braided-liberty-headbands/


To make a DIY braded headband, you will need :
- 1 piece of fabric 20cm x 5cm.
- 3 pieces of same fabric 5cm x 1m
- 1 piece of elastic 5cm
- Tape or something heavy to secure your braid as you work
- Needle and thread
- Scissors
Thursday, June 20, 2013
Homemade Body Scrub
I found this recipe this morning as I was browsing the blogs. It is super easy to make and looks so good that you could eat it!
by SavyNaturalista
Prep time:
Total time:
Ingredients
- 1 cup light brown sugar
- 1 cup white sugar
- ½ cup olive oil
- 10 drops pink food coloring ( I used gel)
- 5 drops sweet orange essential oil
Instructions
- Mix white and light brown sugar together, then add olive oil and five drops of pink food coloring. If you like a darker pink add five more.
- Stir pink food coloring in really well then add essential oils; store in a air tight container.


This is the link if you would like to view more pictures:
Friday, June 14, 2013
Cool Wool Strawberry

I found this cool strawberry on one of my favorite blogs http://liagriffith.com. It can be made from either felt, wool or fabric. The paper version of this strawberry is from paper scrapz and you can download the template there.
I have a smaller version made from fabric that my sweet mother made for me when she was still alive. I would share it here but it is packed away somewhere in my basement which is under construction. Maybe when I get the decorations out for Christmas I can put a pattern together and share it on my blog. For now, I think this one is a winner!


Monday, June 10, 2013
Fourth of July Free Printable Invitation

I found this blog posting while searching for something creative to share with you. I always love finding free printables on the web.
For the complete instructions please go to the following link:
http://liagriffith.com/vintage-fourth-of-july-party-invitation-and-envelope-liner/
Here is an additional link to Lia's free Office Printable Labels:
http://blog.worldlabel.com
Friday, May 31, 2013
Photo Coasters
I have been wanting to make some of these and was really happy when I found this tutorial this morning! You can make them with your favorite flower pics, favorite person pics, etc. This easy photo gift idea only takes 30 minutes hands on time, but can be cherished for years. The photo coasters are crafted in 5 simple steps!


Many, many possibilities! For the complete instructions, please go to the following link:
http://www.julieblanner.com/2013/05/diy-photo-coasters.html


http://www.julieblanner.com/2013/05/diy-photo-coasters.html
Sunday, May 26, 2013
Pillow Covers - DIY

1. First you need to cut your fabric. Decide how big your pillow is going to be. For the length you need to cut 2 times the size of the pillow plus 5 inch. For the width you need the size of the pillow plus 1 inch. For example: if you want your final product to be a 15 inch square pillow you need to cut a rectangle of 35 inch (15 + 15 + 5) by 16 inch (15 + 1).
2. Fold over half an inch at the short sides of your rectangle, at the back of the fabric and fold again. Pin this down.
3. Sew the seams close. If you put your needles perpendicular to the way you are sewing you can sew over the needles. I’m not saying you will never break a needle, but it almost never happens to me and it makes sewing so much faster and easier!
4. Lay down your fabric face up and fold over the sides to the middle of the fabric. The piece on top needs to overlap 3 inch of the piece below it. Pin it down and sew the pillow cover shut with 1 inch seam allowance.
5. To stop the fabric from fraying you can do a zigzag stitch on both sides.
6. That’s it! Your easy peasy pillow covers are ready. If you want to you could add some Velcro or buttons as a closure but there really is no need to do that.
For more photo's from this tutorial, please go to the following link:
Friday, May 24, 2013
Cute Bracelet How To
I don't own that many bracelets. Probably because I can hardly stand anything on my arms. I do have bracelet envy every time I see a cute fun bracelet on someones arm. With this said, I can wear bracelets if they are small and can barely be felt on the arm. When I saw this tutorial this morning I was inspired and excited to create my own simple, danity little bracelets. I have all the supplies at my house. Yes, I am a craft junky! I collect beads as well as paper and just about everycrafty thing you can think of.
You will find the link to the full tutorial below. I would love to see what you create!
Enjoy!
Deanna :)
Link to the tutorial: http://www.henryhappened.com/diy-beaded-bracelets.html


You will find the link to the full tutorial below. I would love to see what you create!
Enjoy!
Deanna :)
Link to the tutorial: http://www.henryhappened.com/diy-beaded-bracelets.html


Wednesday, May 22, 2013
Cute Cake Stand Made From a Terracotta Pot and Saucer

I found this very cute idea this morning. It is a very simple project to make. I can imagine it in different, fun colors as well as adding a texture to it.
Enjoy!
Deanna :)
Add a touch of country charm to any table setting with this rustic, easy to make cake stand. Add your own decorator touch to make your own unique pieces.
You will need:
Terracotta pot and saucer
Dulux One Step Primer
White Aquanamel
Paint brush
Sandpaper
Dulux One Step Primer
White Aquanamel
Paint brush
Sandpaper
How to:
1. Sand the pot and base and wipe away the dust.
2. Apply a coat of One Step Primer to each piece. As both are going to be upside down you don't need to worry about painting the inside of the pot or base.
3. Once the One Step is dry, paint both with the Aquanamel. Apply as many coats as you need to get even coverage.
4. Now that your pieces are beautifully painted, turn the pot upside down standing it on it's rim and place the base on top.
For more tips on this project please go to the following link:
http://www.taradennis.com/create/table/cake-stand.html
Tuesday, May 21, 2013
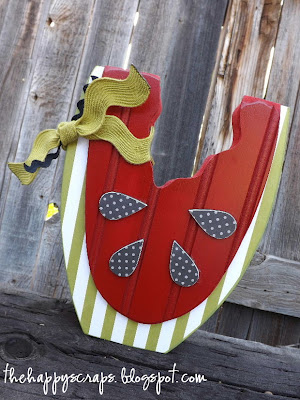
Love the Watermelon!
Here is another cute and fun tutorial from The Happy Scraps Blog Spot. Very fun and cheerful.
Enjoy!
Deanna :)

Here is the link to the full tutorial:
http://www.thehappyscraps.com/2012/05/sweet-bite-of-watermelon.html
Enjoy!
Deanna :)
Here is the link to the full tutorial:
http://www.thehappyscraps.com/2012/05/sweet-bite-of-watermelon.html
Here Comes the Sun!
Summer is almost here! We have survived the winter once again. I am not one to love the cold weather very much. I am a warm weather kind of gal.
I found this cute tutorial this morning and thought it would be fun to share with you. I have been looking for something fun and unique to put on my front door this summer. I love how colorful this is and it is going to be so cute on my front door.
Bring on the sun. Bring on the warm weather. I am ready!
Enjoy!
Deanna :)

For the full tutorial, please go to the following link:
http://www.thehappyscraps.com/2013/05/hello-sunshine-door-hanger.html?utm_source=bp_recent&utm-medium=gadget&utm_campaign=bp_recent
Thursday, May 9, 2013
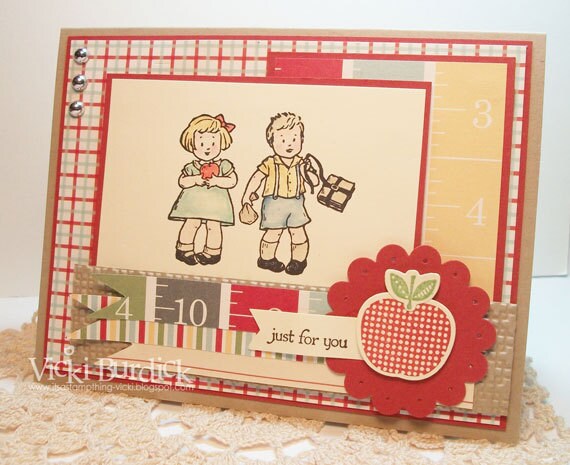
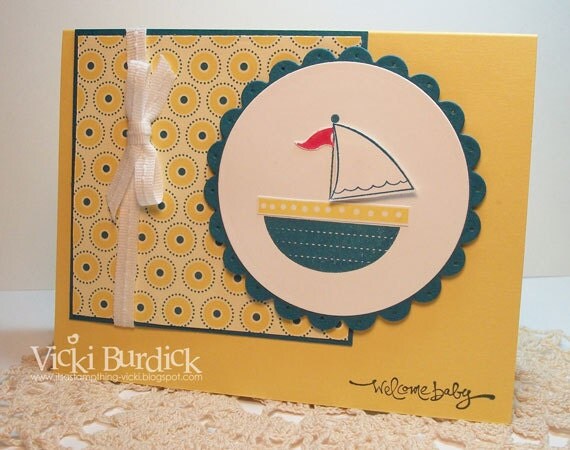
Creative Homemade Cards
Hello!
I was thinking about card making today and was looking at different ideas I have found on the web. I decided to share some of my finds with you. There are some very talented and creative ladies out there making beautiful cards. I hope to be one of the someday!
Enjoy!
Deanna :)


http://pickledpaperdesigns.blogspot.ca/2012/08/case-study-anniversary-blog-hop.html

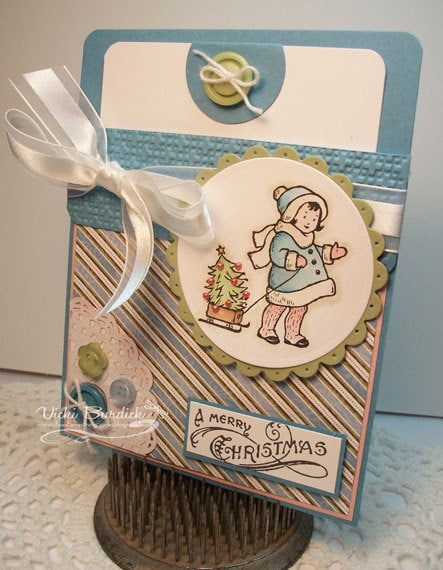
http://www.itsastampthing-vicki.blogspot.com/2013/04/dynamic-duosbirthday-balloons.html

http://seizethebirthday.blogspot.ca/
https://www.etsy.com/shop/vanillagirl75?ref=seller_info
.jpg)
http://thecricutbug.blogspot.com/2013/03/baby.html
I was thinking about card making today and was looking at different ideas I have found on the web. I decided to share some of my finds with you. There are some very talented and creative ladies out there making beautiful cards. I hope to be one of the someday!
Enjoy!
Deanna :)
http://pickledpaperdesigns.blogspot.ca/2012/08/case-study-anniversary-blog-hop.html
http://www.itsastampthing-vicki.blogspot.com/2013/04/dynamic-duosbirthday-balloons.html
http://seizethebirthday.blogspot.ca/
https://www.etsy.com/shop/vanillagirl75?ref=seller_info
http://thecricutbug.blogspot.com/2013/03/baby.html
Wednesday, May 1, 2013
Freebies from Lettering Delights

Enjoy!
Deanna :)
http://www.letteringdelights.com/searchsite.php?scatid=3
Monday, April 22, 2013
Candle Making is Simple!
FLOATING CITRONELLA CANDLES

For complete information on how to make these floating candles, please click on the following link:
http://www.positivelysplendid.com/2012/04/diy-floating-citronella-candles.html
- Are muffin tins used for this project food safe afterward?
- Although the soy wax is plant-based and the crayons are non-toxic, the citronella is not intended for consumption, so to be on the safe side, I would recommend only using old muffin tins that you do not intend to use for edible items later on.
- Where can I buy the citronella oil?
- I purchased my oil at Whole Foods. After making three batches of these candles, I still have well over half of the bottle remaining!
- Can I use melted down, old candles I have on hand for this project?
- As long as the candles are all-natural and free of perfumes, I would say that would work just fine. Avoid using scented candles, though, as that might interfere with the effectiveness of the essential oil.
- How much oil do I need to add?
- After a bit of trial and error, I have found a good oil-to-wax ratio to be 5 drops per cup of unmelted wax. You want to add enough oil to make them potent, but not so much that it starts to separate from the wax. Of course, you can always feel free to experiment by adding even more than the amount I’ve specified.
- Will these provide 100% protection from bug bites?
- Probably not. While I have found that sitting within a close proximity of these candles definitely reduces the number of bites I receive, I definitely recommend using another method of protection if you want to avoid bites entirely. For a great, all-natural option, check out my recipe for homemade all-natural bug repellent.
Travel Candle
Whether you’re traveling for the holidays or staying put this chic gold candle adds a bit or romance. Personalize it by adding a few drops of your signature scent or a swatch of patterned paper to the lid. Who knew making your own candle was so easy?
For the full instructions on how to make these fun little travelers, please visit:
https://www.forthemakers.com/projects/hester-travel-candle
https://www.forthemakers.com/projects/hester-travel-candle

https://www.forthemakers.com/projects/hester-travel-candle
Friday, April 19, 2013
Bag It! Cute Tote Bag Tutorial
I found this adorable tote bag tutorial and want to make one! Hope you like it and you might want to make one for yourself!
Happy Sewing!
Deanna :)
http://beeinmybonnetco.blogspot.com/2012/02/tutorial-and-giveaway.html


Free Grunge Textures
Check out these free textures from one of my favorite websites, French Kiss Collections. These textures are great for your picture projects. They are free, so what do you have to lose? There are also other freebies on the sight. Check the right side of the page under the title Freebie. Have fun trying them out!

Subscribe to:
Posts (Atom)